
Only a few months left before you say yes to your heart? If you have already focused on your outfit, all that remains is to choose a beauty look. And in addition to the beautiful wedding hairstyle you’ll be sporting, it’s time to look at makeup to complete your look. One thing is for sure, whether you prefer to do it in an institute or at home, you should do a few tests before the big day. We’ll give you some tips.
Successful wedding make-up at the institute
The first solution (but of course more expensive) remains to find the right institute that will create the perfect makeup for your eyes. It’s a good idea to do it a few months in advance to do a few tests, but above all to make sure that the make-up artist you’ve chosen will be available on the right date. He will then be able to reassure you, guide you and advise you on the products, textures and shades that will suit you best!
Successful DIY wedding makeup
It is also possible to do your own wedding makeup. There’s no better way to do this than with the advice of Patrick Lorentz, senior makeup artist at Estée Lauder. With him, we take stock of how to shine on the big day without making any mistakes. In program? Natural makeup for the day, slightly more advanced makeup for the night.
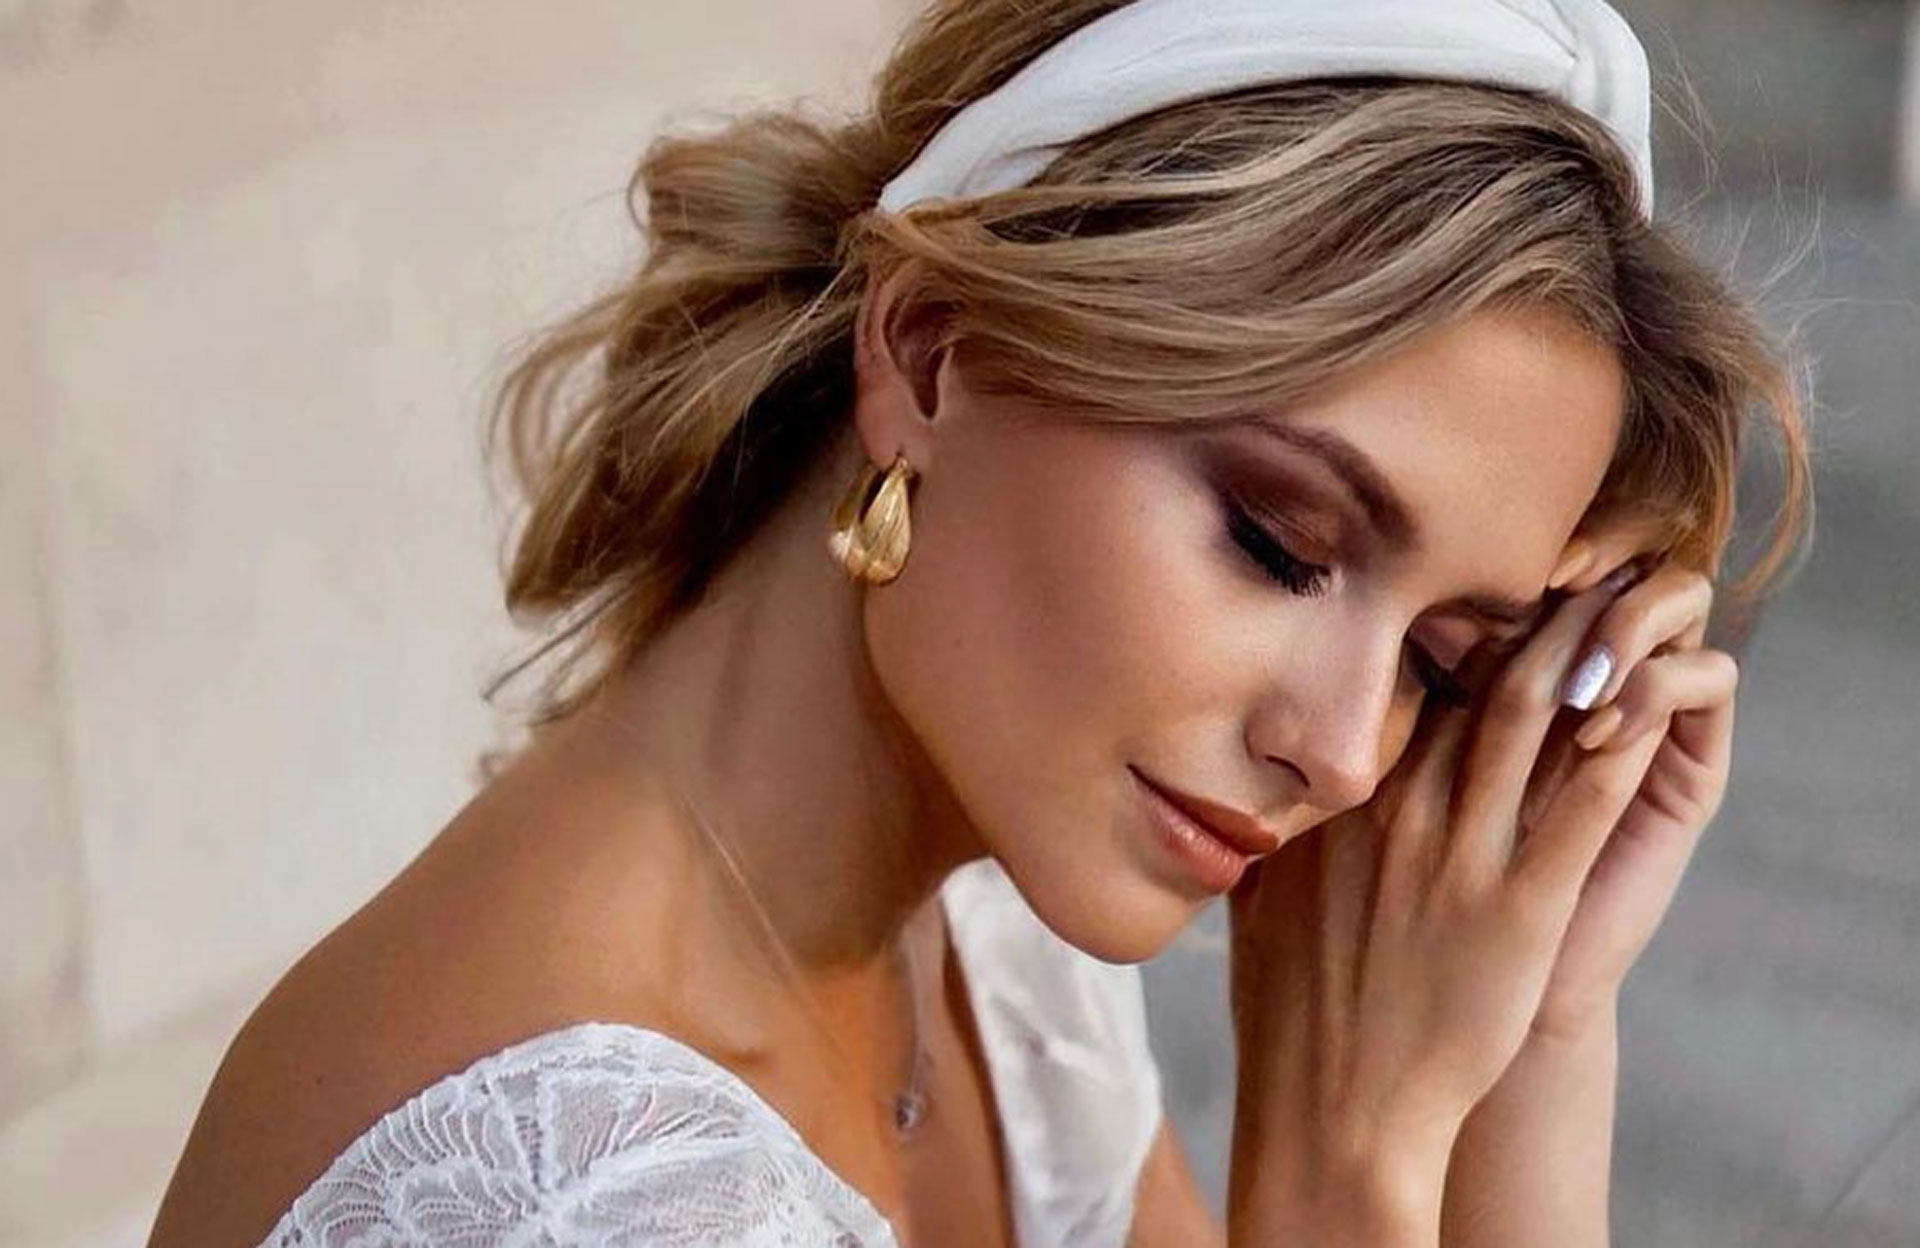
Natural makeup for the day
Skin makeup
You always have to ask yourself how the makeup will look in the photos. The flash brings shine and irregularities – even dry skin is affected. The expert therefore advises to mattify the skin with a foundation that will act as a virtual blotter between the skin and the foundation. In addition, the skin must not be darker than the skin with the risk of creating a border. Therefore, you should definitely not change your habits in terms of coverage and intensity. Instead, use the same product as usual, whether it’s a foundation with SPF, a toner or a face serum. The whole thing? May it be long-lasting. For those who want to do a UV session before the big day, it is important to change the shade of the foundation, but always tone to tone. Extra tip? Add a drop of serum rich in hyaluronic acid to your foundation.
Focus on the cheekbones
Cheekbones are the driest part of the face and powder blush will mark the fine lines around the eyes. However, if you don’t have a cream blush on hand, take a blush brush and squish it onto your powder product by inverting it so that the pigments soak into the bristles. Then mix a drop of Advanced Night Repair serum (rich in hyaluronic acid) into the blush. This gives a liquid texture, less dense than powder and does not mark wrinkles.
A tip that applies day and night: we ban powders and creams that are too iridescent. With flash, these textures are rarely aesthetically pleasing.
Focus on dark circles
Although the desire to mask dark circles and bags with makeup crosses our minds, there is no point in overdoing it with concealer. This product tends to settle into fine lines and mark features. Trick? Apply a touch of eye contour and a touch of concealer to the top of your hand. Blend with a concealer brush and apply to the pockets. The corrector covers the eye area, while the gel hydrates it. It should not be lighter than the skin, otherwise the color will be gray. Finally, using only the concealer, focus on the inner corner (where the small vein runs) and the outer corner (the red line in the corner).
Eye makeup
During the day, it’s good to stay like a wedding dress: simple and natural. To do this, start by applying an eye primer to the eyelids to prevent the makeup from sliding into the creases in case of sunburn or unwanted crying. Apply a light shadow (blotting pink or beige) to the mobile eyelids.
Then dip the tip of the eyeliner into the darker eyeshadow and place a small shadow near the lashes to create a smoky effect. It’s a good idea to avoid liner on your lower lashes, especially if you have bags or dark circles. This makeup feature is suitable for small eyes but looks very sophisticated; so we’d better save it for the evening. Blue eyes will prefer a bronze pencil (with light hair) or a chocolate or brown pencil (with brown hair and dark skin). With green eyes, a purple to blue or gray palette will be ideal (but not plum, as this emphasizes blood vessels). With brown eyes, the expert recommends shades of midnight blue (for dark hair) or jean blue (for light hair). Last advice? Avoid spreading eyeshadow all the way up to your eyebrows.
Last but not least, waterproof or long-lasting mascara will be your best ally in resisting tears of joy. The last ultra-practical tip: store two cotton swabs, halved, pre-soaked in make-up remover, in a thin box. If the tears take hold, it will be easier and faster to remove any burrs.
Oral makeup
Start by brushing some loose powder into your mouth. Use your lips to pinch the tissue like a sieve. This powder effect guarantees a longer lasting lipstick. Then focus on nude or even pink ink to perfect your smile without ever going overboard.
Strong make-up for the evening
Dinner is approaching, some adjustments are necessary. There’s no need to go through the makeup removal process, just a few steps to amp up your makeup look and be ready to dance the rest of the night away.
Skin
Before the evening, mix – in the same amount and using a powder brush – a little foundation and primer on the back of the hand. Rub all over the face in a circular motion: this will condition the skin and mattify it at the same time. It is also essential to always have a compact powder in a small bag.
Eyes
For the eyes, add radiance with a light pencil (one to two shades lighter than the skin). Apply it to the inner corner of the eye by drawing a small “c”, then do the same, in a larger version, to the outer corner (under the brow bone and under the cheekbone). Blend well and add a pencil (black for black hair, gray if you have light or brown hair) up to the middle of the lid. Pull the material to the crease of the eyelid with your finger. Then apply a slightly shimmery eye shadow to the pencil and blend again with your finger. The result? An easy smoky eye that doesn’t settle on dark circles.
Mouth
Last step: Remove the powder and replace the lip ink. For the evening, it is possible to dare to have a more pigmented lip. Since low lighting tends to fade colors, you can even opt for red lipstick. It is also possible to add a touch of gloss to create a vinyl effect.
What about a wedding manicure?
Place in the foreground when exchanging wedding rings and a photo as a keepsake that belongs to them, even hands deserve quality treatment. To make your wedding manicure perfect on the big day, it’s a good idea to take care of your nails at least two weeks before. Start with a rounded nail file, preferably shorter. Apply the emollient water to soften the cuticle and leave for a few seconds. Use a stick to process the small peels and cut with tongs if necessary. Use a cotton swab dipped in alcohol to clean the nail, then buff it to remove the last streaks. Nourish the cuticle with a suitable oil, massage and add hand cream. Please note: the hydration step should be repeated every day until the wedding if possible.
Apply nail polish the day before the big day. Degrease the nail with a cotton swab dipped in alcohol. Apply a clear base, then one or two coats of your choice of polish (clear manicures are often the most popular) and finish with a top coat that borders each nail.